 monthlet
monthlet is a note app where you write and grow notes through AI chat.
A folder gives a note exactly one place to live. If you file a meeting note under “Work,” it is not also under “2026.” Tags have no such limit: a single note can carry as many as you want.
Tags have been in the app since the first beta release (0.9.0). They are fairly intuitive, but this journal entry walks through how to use them.
Adding tags to a note
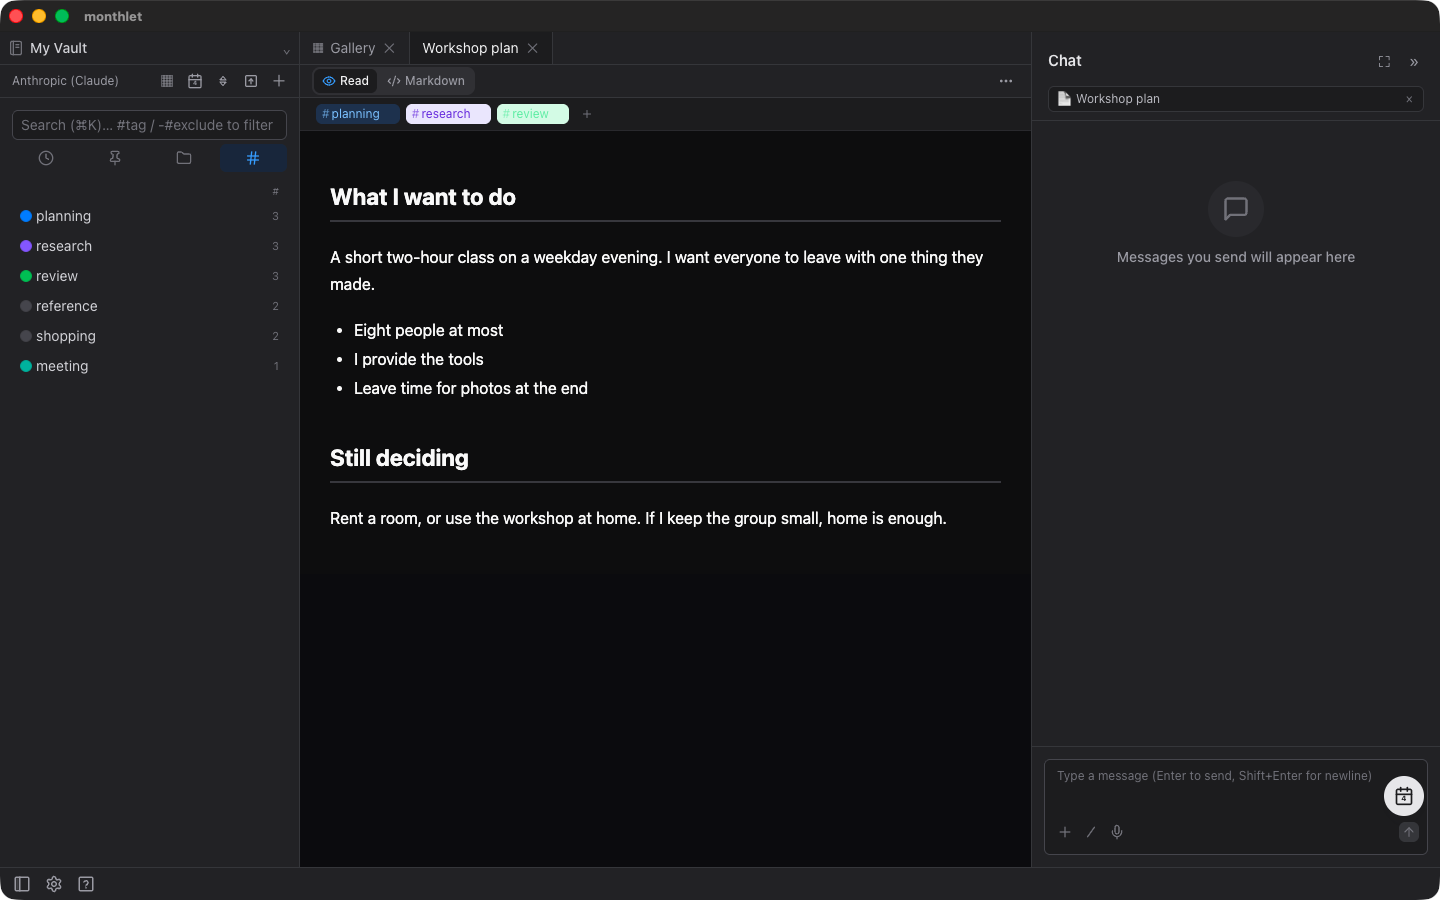
Open a note and you will see a row of tags just below the toolbar. Press “+”, type, and hit Enter to attach a tag. To remove one, hover over it and press the × that appears. Right after removing a tag, a notification with an undo action appears, so an accidental deletion can be reversed.
While you type, existing tags that start with the same characters show up as suggestions. This is there to stop the same idea from accumulating under slightly different names.
Tags are case-insensitive. TODO and todo are treated as the same tag, and the form that stays visible is whichever one you entered first.
Spreadsheet documents have the same tag row, and tags are added and removed the same way.
AI tag suggestions
When you create or rewrite a note through chat, a chip with suggested tags appears above the input field. These are tags inferred to fit what was written.
Click one to attach it, or use the option to apply them all at once. They are only suggestions — the AI never attaches tags on its own.
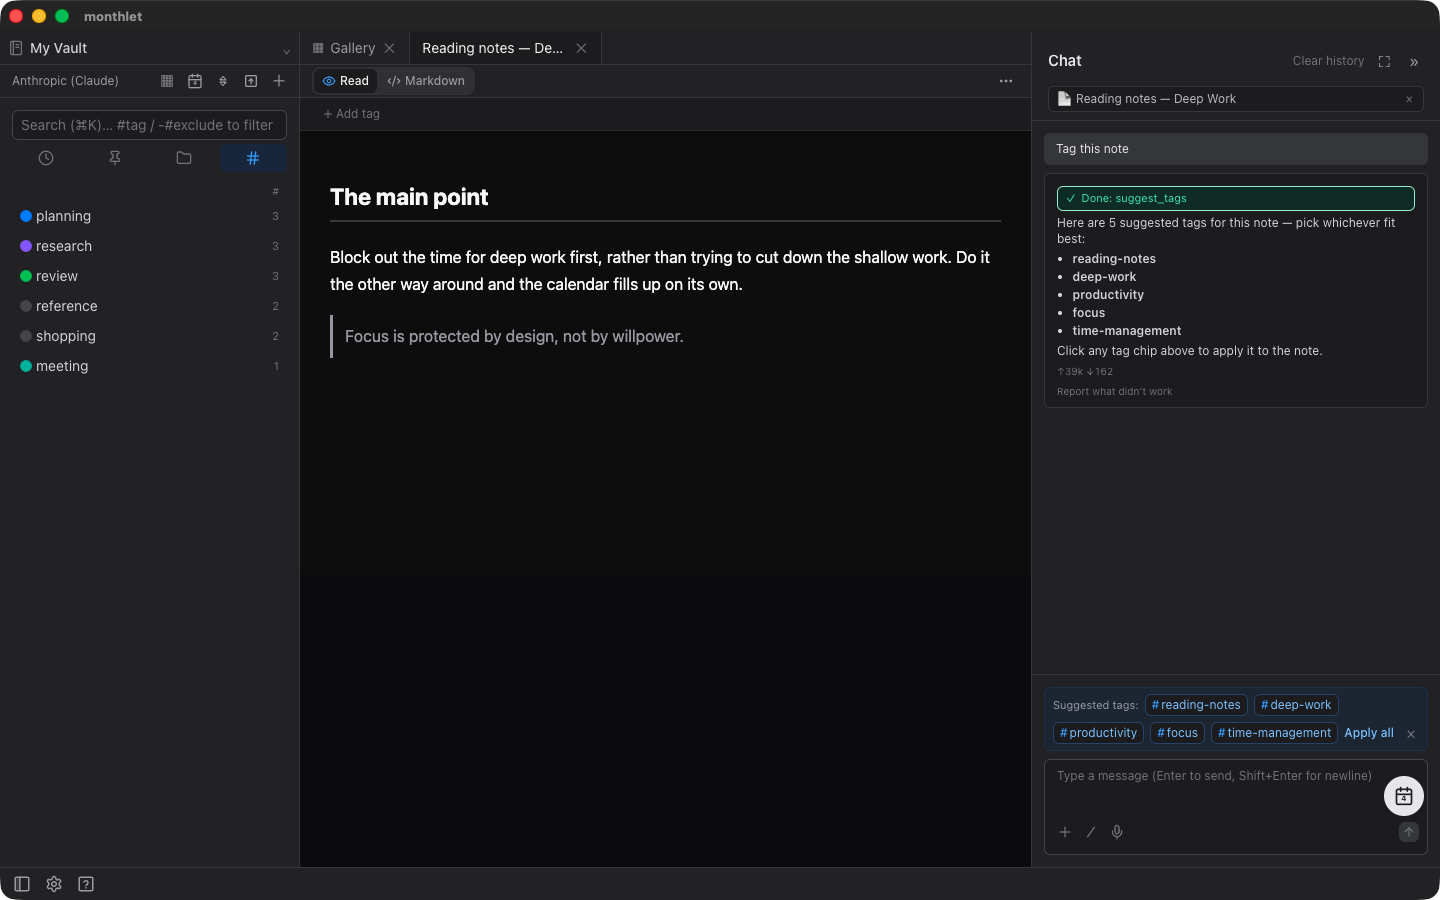
Even when you are not creating a note, you can ask for suggestions alone, for example by saying “add tags to this note.” If you would rather not see suggestions at all, you can turn AI tag suggestions off in the AI section of the settings.
The suggestions above and the filtering described next are covered in a short video.
Finding notes by tag
There are three entry points.
The first is search. Press ⌘K and type #tagname to narrow the results to notes with that tag. Prefix it with a hyphen — -#tagname — to exclude notes carrying that tag.
Once two or more tags are included, a toggle appears between requiring all of the tags and requiring any of them. The default is requiring all of them, and the toggle does not appear when only one tag is included.
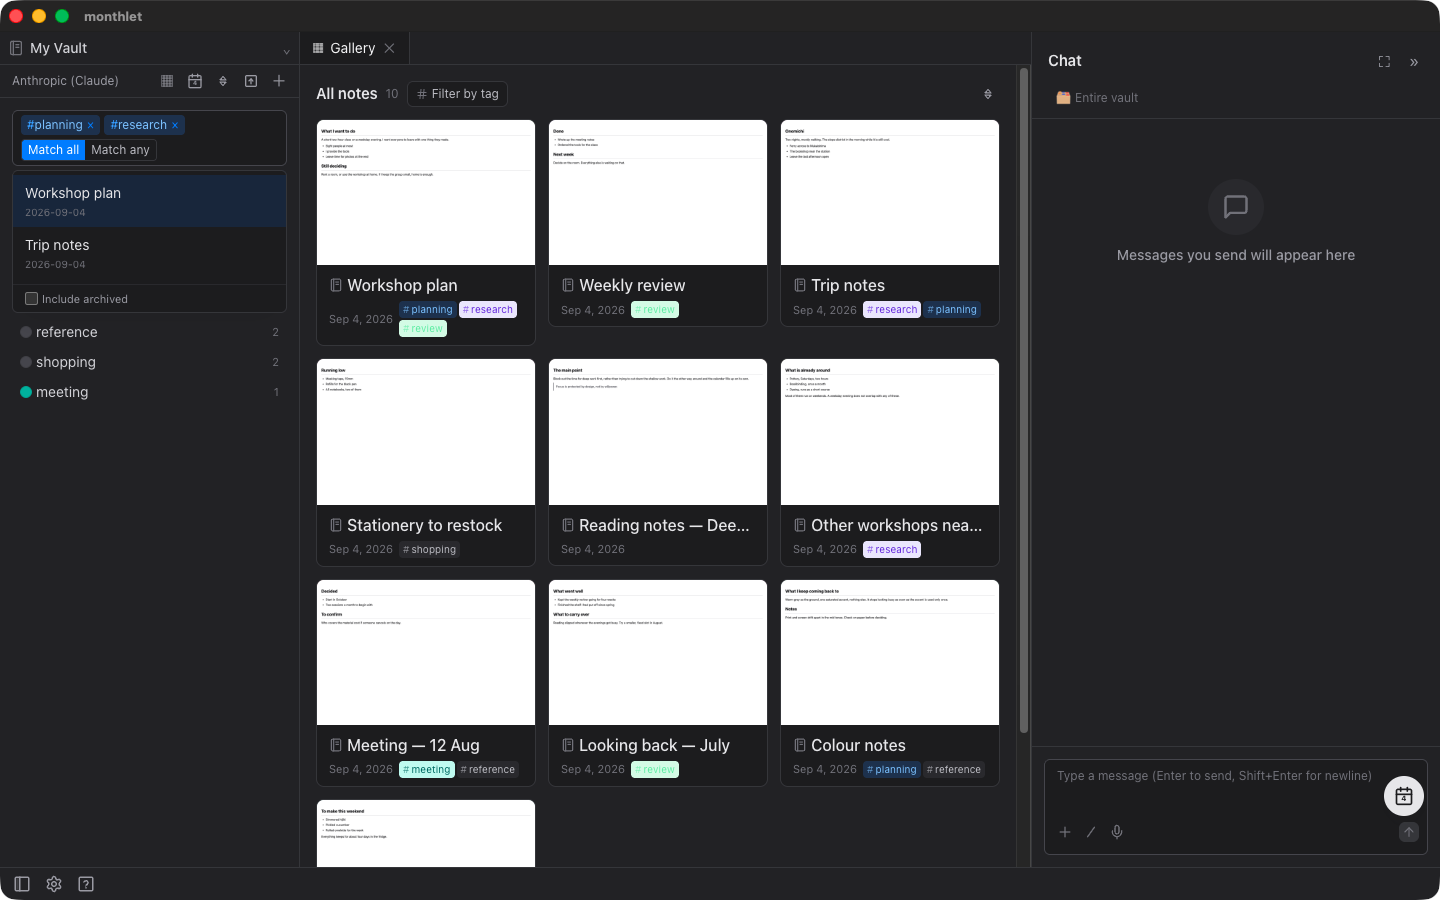
The second is the gallery. The card list has the same filtering, and each tag chip cycles through include, exclude, and cleared as you press it.
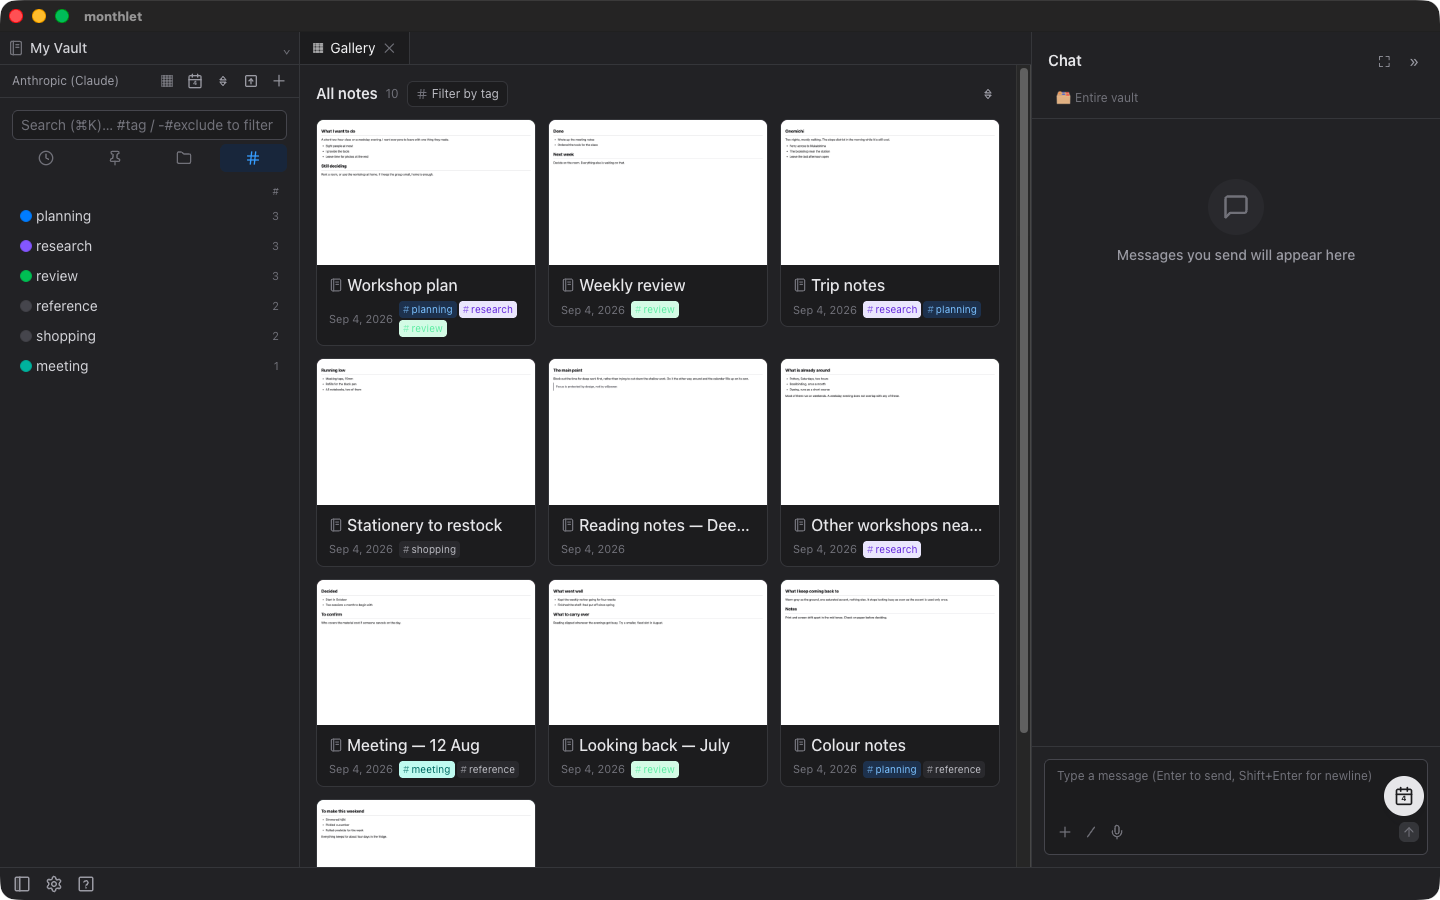
The third is the sidebar. Switch the tab below the search field to tags, and every tag in the vault is listed along with how many times it is used. Press one to filter the gallery by it.
Renaming and deleting in bulk
Right-click a tag in the sidebar for rename and delete options.
Renaming replaces the tag across every note that carries it. If you rename it to a name that already exists, the two tags merge into one. This is the way to clean up tags that have drifted into several spellings.
Deleting removes the tag from every note. The notes themselves are untouched.
Both actions show a notification with an undo action immediately afterward. Pressing it restores the tags on the affected notes. Only the most recent action can be undone, and only during the few seconds the notification is on screen.
#tags written in the body are something else
You can also write #tagname inside a note’s body or in a spreadsheet cell. In reading mode it becomes a dotted link, and pressing it filters the gallery by that tag.
That is all it does, though — it is a link, and it is not registered in the tag row.
If you want a tag written in the body to be findable, add it to the tag row as well.
Colors
In the sidebar tag list, press the circle to the left of a tag to pick a color. The color shows up in the tag row, in the gallery, and in the list.
Colors have a second job. In the note map, which shows how notes connect, each note takes the color of its first tag.
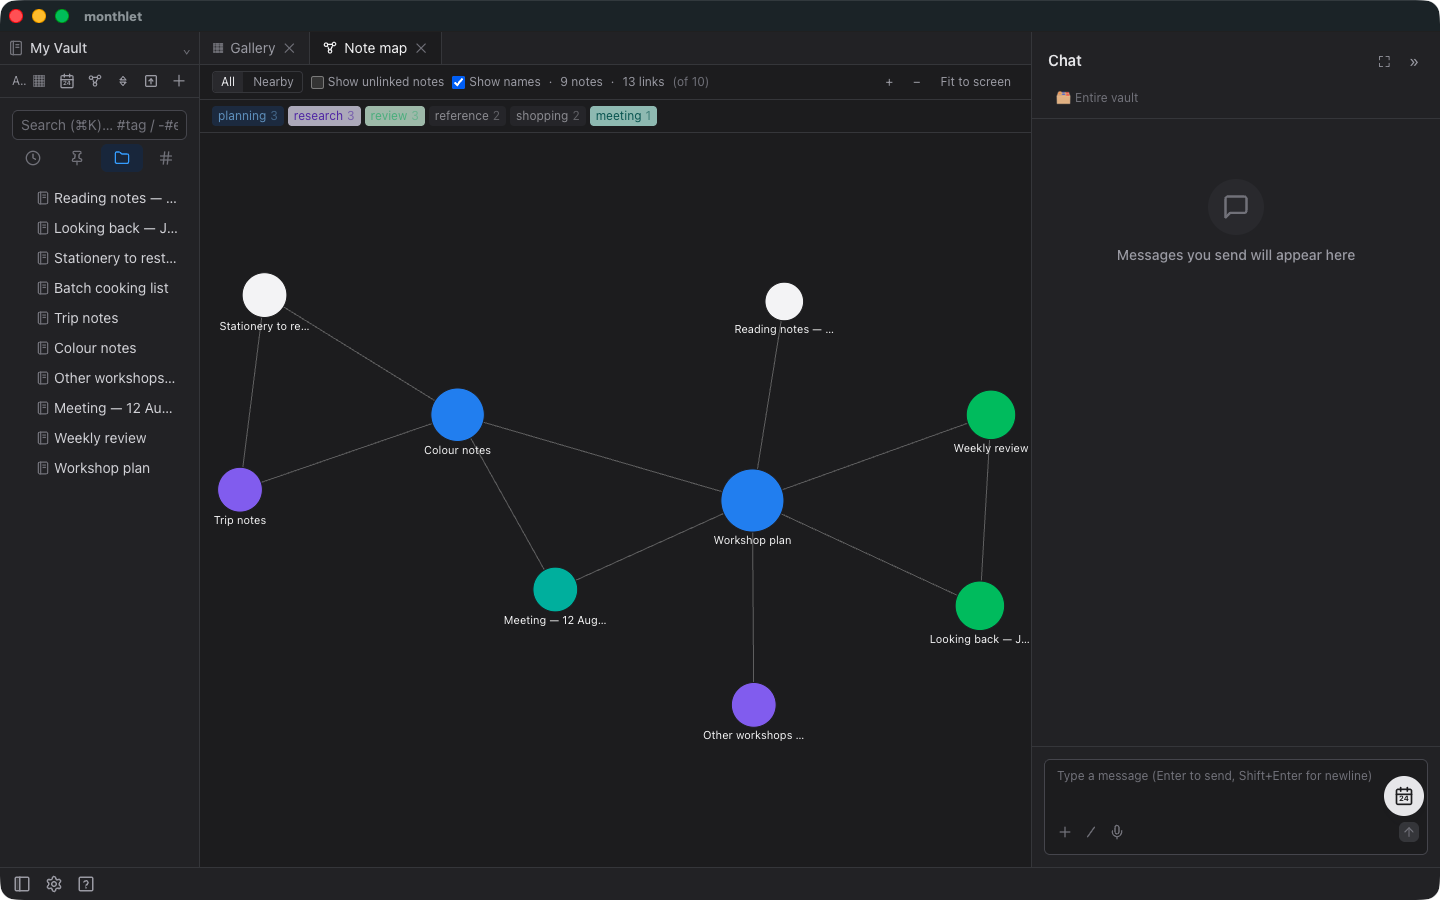
So tags are not only for classifying — they also help you tell notes apart in the map.
Tags are not hierarchical
Tags cannot be nested in a #parent/child form. All tags are flat.
Tags exist to cut across folders, so we did not build another hierarchy on top of them. Instead of depth in the classification, you get colors and the note map to tell things apart.
Try it
monthlet is currently distributed for macOS (Apple Silicon). A Windows version is in preparation. Enter your own AI API key and every feature is available.
-
Download: https://monthlet.ai/download
-
Discord: https://discord.gg/aP4Hc7cJGU